Category: The First Descendant

How to Unlock Esiemo in The First Descendant

Unlocking Esiemo in The First Descendant can be a complex process, but with the right strategy, you can achieve it in the fastest and most efficient way possible. In this guide, we’ll walk you through the steps required to unlock Esiemo, detailing each requirement, the best characters to use, and the most efficient farming methods. Buy Esiemo Character Unlock Boost, use “harry” coupons to get 5% off!

  1. Unlocking Hard Mode
    Buy TFD Void Intercept Boost to quickly get the mods and required parts.
    The first requirement to unlock Esiemo is having Hard Mode fully unlocked. To do this, you’ll need to complete the main campaign, which takes approximately 16 to 20 hours. Once you’ve completed the campaign, all areas will be unlocked, allowing you to access Hard Mode.

  1. Required Descendants

You’ll need to utilize specific Descendants to streamline the process of unlocking Esiemo:

  • Sharon: Essential for Stealth Infiltrations, which are required for specific tasks.
  • Frina: Used for Void Fragment missions, particularly for crafting Amorphous Material Patterns.
  • Fire Descendant (Lepic or Blair): Necessary for Void Fragment missions that require fire-based attacks.
  • Glay or Bunny: While not required, these Descendants can significantly speed up certain parts of the process. Glay is particularly useful for boss fights in Hard Mode.

  1. Crafting Components and Materials

To craft Esiemo, you’ll need to gather several materials and blueprints. Below is a breakdown of what you need and where to find them:

Blue Materials

These materials are easy to farm. Simply press F (on PC) to locate resource boxes. Each box can provide between 50 and 200 resources, allowing you to gather everything you need in about 30 minutes. Use the Tab key on PC (or R Stick on console) to find the resource boxes on your map.

Purple Materials

  • Deformed Biom Metal: Found in the Frozen Valley FUS Strategic Outpost. Using Sharon is recommended to also farm Amorphous Material Pattern 119.
  • Organic BioGel: Acquired from the Kingston Communication Repeater mission. Do this on Hard Mode to gather all materials in less than 10 minutes.
  • Specialized BioMetal: Found in the Dune Base Outpost. This mission also provides Amorphous Material Pattern 109, which is useful for other crafting requirements.

Blueprints

To craft Esiemo, you’ll need the following blueprints:

  • Enhanced Cells: Use Amorphous Material Pattern 59, which has a 32% chance of dropping Enhanced Cells. This pattern is found by completing the Slumber Valley Infiltration Operation on Hard Mode.
  • Stabilizer: Found using Amorphous Material Pattern 77, with a 10% drop chance. Obtain this by defeating the Devourer on Hard Mode after completing the Supper mission.
  • Spiral Catalyst: Use Amorphous Material Pattern 109, which has a 20% chance of dropping this blueprint. This pattern also drops other valuable items, making it highly efficient to farm.

The Code

The code to unlock Esiemo can be farmed using Amorphous Material Pattern 54, which has a 6% drop rate. This pattern is best farmed from the Fallen Theater Outpost. While not necessary, using Sharon is recommended to also farm parts for Kyle.

  1. Crafting Esiemo

Once you have all the components and materials, you can begin crafting Esiemo. Start by researching the Enhanced Cells, Spiral Catalyst, and Stabilizer. Each of these takes 8 hours to research. While these are being researched, continue farming for the code. Once you have everything, the final research to craft Esiemo will take an additional 16 hours.

By following this guide, you should be able to unlock Esiemo efficiently. Make sure to plan your farming routes, use the recommended Descendants, and take advantage of the dual-purpose missions to save time.

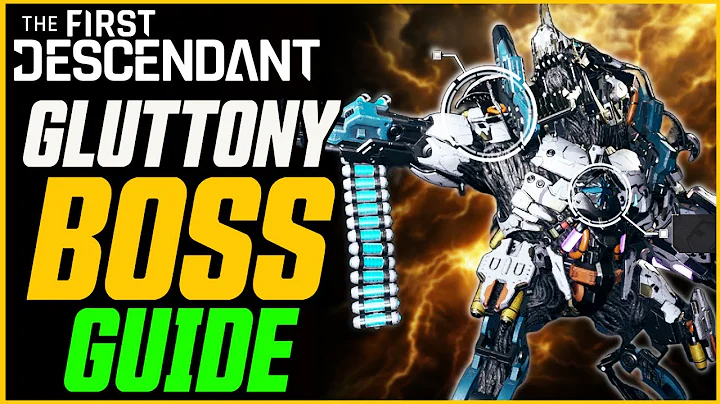
The First Descendant: Gluttony Boss Guide

The Gluttony (level 140) is currently the toughest boss in The First Descendant. The Best Boost Gluttony TFD Void Intercept Service is provided by U4GMt and is done quickly. Use coupon code “allen” to get 5% off at U4GM. Let’s take a look at everything you need to know to defeat this challenging boss.

Key Mechanics and Strategy
1. Initial Damage Phase:
· Start by dealing damage to Gluttony until he enters his immunity phase. If you want Top-Up Cheap The First Descendant Service Caliber, U4GM is the first choice, which is instant delivery
2. Immunity Phase:
During this phase, Gluttony becomes immune to damage. To break this immunity, you need to interact with specific environmental elements:
· Blue Balls: Shoot the blue balls towards Gluttony. These balls are linked to him and help in breaking his immunity.
· Purple Balls: Pop the purple balls when they are close to Gluttony and the blue balls are linked to him. This action will help to get him out of the immunity phase.
3. Tube Mechanic:
· Gluttony has a tube on his arm that fills up with damage. To empty this tube, stop dealing damage and focus on shooting the blue balls towards him. This will help in managing the tube mechanic and prevent it from filling up completely.
4. Frenzy Mode:
If Gluttony enters frenzy mode, the arena will start producing more ice cubes and pink balls. The strategy here involves:
· Shooting the ice cubes close to Gluttony.
· When the ice cubes are near him, shoot the pink balls to detonate them and bring Gluttony out of frenzy mode.
5. Critical Damage:
· After breaking his immunity and frenzy phases, focus on critical points such as his shoulders and chest to deal significant damage. Utilize buffs and abilities from characters like Enzo and Luna to maximize damage output.

Team Composition and Tips
· Team Setup: Consider using characters that provide buffs and healing, such as Enzo and Luna, to support your damage dealers.
· Coordination: Ensure that all team members understand the mechanics, especially the immunity and frenzy phases, to avoid unnecessary wipes.
· Adaptability: Be prepared to switch targets and manage environmental elements efficiently to keep Gluttony from regaining immunity or entering frenzy mode.

By following these strategies and coordinating with your team, you can effectively defeat Gluttony in “The First Descendant” and progress through the game.

The First Descendant: The most recommended 3 STARTING DESCENDANTS

This guide will cover the three starting descendants you can choose from: Lepic, Ajax, and Viessa. While many recommend choosing a descendants based on your play style, this guide will outline the strengths and weaknesses of each starting character to help you make an informed choice.

Lepic: The Grenadier DPS

33

To quickly unlock Lepic, you need to collect materials. After collecting all the materials, you will need a Lepic Code. You can use points to buy Codes and Blueprints or buy fast Lepic Unlock Boost Services. Use coupon code “harry” at U4GM to get discounts and save more!

Lepic is a powerful DPS descendant who excels in dealing area-of-effect damage. He has a unique set of abilities that make him a group nuke powerhouse:

Abilities:

  1. Grenade Throw: Deals massive damage to multiple enemies. With power bonuses and modules, this ability can potentially one-shot high-level enemies.
  2. Overclock: Increases skill power and inflicts burn damage on enemies, enhancing your first and ultimate abilities.
  3. Grouping Skill: Pulls targets into one spot, making them easy to eliminate with your other abilities. However, it cannot pull special units and bosses.
  4. Overkill (Ultimate): Uses an arm cannon to deal massive damage continuously but consumes mana points. Passive:
  • Close Call: Grants immunity to crowd control and damage while increasing health recovery for a short duration when receiving fatal damage. Unique Skill Modules:
  • Increased Gain: Removes MP consumption while Overkill is active.
  • Nerve Infiltration: Removes the burn effect of Overclock but grants weakened regeneration.
  • Power Unit Change: Increases weapon damage.
  • Regenerative Breaking: Recovers MP after using a skill. Summary:
    Lepic is versatile, offering good survivability, crowd control, and damage. He is a solid choice for players who want a well-rounded character that can excel in both field missions and endgame content.

Ajax: The Defensive Specialist

Unlocking Ajax codes and blueprints requires points redemption, and buy TFD Campaign Boost Services can quickly obtain a large amount of materials.

Ajax is a defensive specialist who excels at keeping himself and his team alive. His abilities focus on defense and crowd control:

Abilities:

  1. Orbit Barrier: Creates a rectangular barrier that negates and reflects incoming damage.
  2. Slam Attack: Jumps and stomps the ground to stun and damage enemies.
  3. Expulsion: Releases a pulse that knocks back enemies.
  4. Dome (Ultimate): Creates a protective dome that increases weapon damage for allies inside. Passive:
  • Void Energy: Enhances abilities when void energy is accumulated. Unique Skill Modules:
  • Body Enhancement Matrix: Increases defense and grants an energy shield.
  • Defense Simplification: Boosts allies’ defense and grants them energy shields.
  • Void Barrier: Allows the Orbit Barrier to be moved and enhances its reflective damage.
  • Void Charge: Increases the damage of the slam attack. Summary:
    Ajax is perfect for players who prefer a tank role. He offers substantial defense and support capabilities, making him invaluable in challenging missions. His unique skill modules can turn his defensive abilities into offensive tools.

Viessa: The Crowd Control Specialist

In addition to collecting the corresponding materials and blueprints, unlocking Ultimate Viessa also requires the Ultimate Viessa Code, which is a unique code. Like Blueprint, you need to spend points to buy or use professional Ultimate Viessa Unlock Boost Services.

Viessa excels in slowing down enemies and controlling the battlefield. She is particularly effective in boss fights due to her debuffing abilities:

Abilities:

  1. Ice Shards: Shoots ice shards that deal damage and slow enemies.
  2. Frost Road: Leaves ice trails that slow enemies and increase your movement speed and energy shield.
  3. CT Snap: Creates ice puddles that apply the ice shackle debuff to enemies.
  4. Blizzard (Ultimate): Continuously damages and slows enemies while lowering their defenses. Passive:
  • Ice Shackle: Creates floating orbs that deal damage when ice shackle stages are reached. Unique Skill Modules:
  • Cold Blooded: Reduces MP cost and skill duration, increasing skill power.
  • Cold Snap Watch: Allows cold snap ability to linger on the ground.
  • Glacial Cloud: Converts CT Snap into a throwable blizzard.
  • Hypothermia: Replaces ice shackle with a damage-over-time effect. Summary:
    Viessa is ideal for players who enjoy crowd control and DPS roles. She can significantly slow down enemies and bosses, making her an excellent choice for controlling the battlefield. Her unique modules can turn her into a powerful DPS character with the right build. Enhancing Your Descendant

To increase the power of your starting descendant, consider the following tips:

  • Equip reactors that match the characteristics of your descendant’s abilities (e.g., Singularity, Modular Chill, Fusion).
  • Use skill cooldown modifiers and MP efficiency modifiers.

Powered by WordPress & Theme by Anders Norén